
Opening Procreate & Understanding the Workspace

Procreate is your digital workspace
This is where you will:
practice brow mapping
create stroke patterns
build shading techniques
visualize client results
Instead of working on physical skin, practice repeatedly in a clean and controlled environment.
Lesson 2
In this lesson…
you’ll open Procreate and learn how to navigate the workspace so you feel comfortable using the canvas, tools, and panels.
Understanding where everything lives inside Procreate will help you move with more ease and confidence as you begin practicing PMU digitally.
Start Lesson 2 ↓

This is Video 2 of the Sacred Beauty Art 5-Part Setup Series, designed to help you build a strong digital foundation for practicing PMU with Procreate.
Step-by-Step Guide ↓
✦ Step 1 - Open Procreate
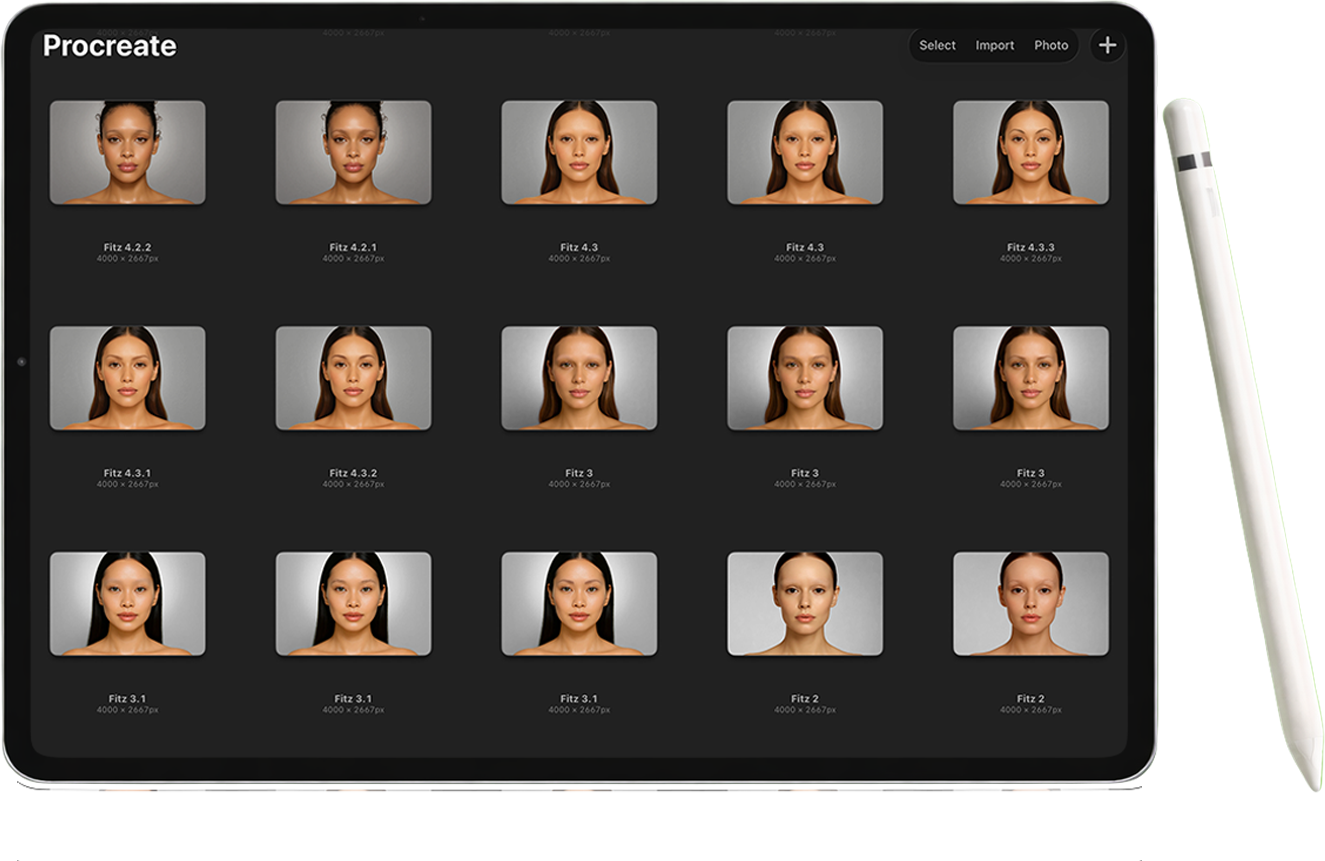
Locate the Procreate app on your iPad and tap to open it. When you open Procreate, you’ll land inside the Gallery.
This is your home base where all of your projects will live.
Each project appears as a thumbnail.
Tap on any canvas
To return to the gallery:
Tap Gallery in the top left corner
✦ Step 2 - Understand the Gallery Tools
At the top right of the gallery, you’ll see:
Select → choose multiple canvases
Import → bring in files from the Files App
Photo → import from your camera roll
+ (Plus Icon) → create a new canvas
These tools help you:
organize your work
import practice files
create new projects
✦ Step 3 - Create a New Canvas
Tap the + icon in the top right.
You’ll see preset canvas sizes.
To create a custom canvas:
Tap the small + icon inside the menu
Enter:
Width: 3000 px
Height: 3000 px
DPI: 300
This creates a clean, high-quality canvas for PMU practice.
✦ Step 4 - Rename Your Canvas
Before starting, rename your project to stay organized.
To do this:
Tap Gallery
Tap the name under your canvas
Rename it to something like:
PMU Practice
✦ Step 5 - Understand the Top Left Tools
Inside your canvas, look at the top left:
Wrench Icon (Actions)
Used to:
insert images
adjust canvas settings
export your work
Magic Wand (Adjustments)
Used to:
adjust brightness
blur
color
Selection Tool (S icon)
Used to select specific areas
Transform Tool (Arrow icon)
Used to:
move
resize
rotate
✦ Step 6 - Understand the Right Side Tools
At the top right:
Brush Tool
Opens your brush library
(Your PMU brush set will appear here once installed)
Smudge Tool
Softens and blends strokes
Eraser Tool
Removes parts of your drawing
(Can match any brush style)
✦ Step 7 - Work with Layers
Tap the Layers icon.
Layers are like stacked transparent sheets. Each layer holds part of your work separately.
To create a new layer:
Tap the + icon
To rename a layer:
Tap the layer → tap Rename
Examples:
Brow Mapping
Practice Strokes
Shading
✦ Step 8 - Toggle and Organize Layers
Next to each layer is a checkbox:
Turn layers on/off to compare work
Tap the “N” on a layer:
Adjust opacity
Explore blend modes
Swipe left on a layer to:
Lock
Duplicate
Delete
✦ Step 9 - Understand Colors + Swatches
Tap the color circle in the top right.
You’ll see:
Disk → choose colors visually
History → recently used colors
Palettes → saved swatches
If you downloaded your PMU swatches, they will appear here.
✦ Step 10 - Move Around the Canvas
Use gestures:
Pinch to zoom in/out
Drag with two fingers to move
On the left side:
Top slider → brush size
Bottom slider → opacity
Why This Matters
Learning the Procreate workspace is like learning your setup station before a service.
Once you know where everything is:
you move faster
you make fewer mistakes
your practice becomes more intentional
This is where your digital environment begins to support your artistry.
✨ Your Goal for This Lesson
Before moving on, take a moment to:
✔ Open Procreate
✔ Create a 3000 x 3000 canvas
✔ Rename your canvas
✔ Tap through the tools (brush, layers, color)
✔ Create at least one new layer
You don’t need to master everything, just become familiar.
Up Next…
In the next lesson, we’ll go deeper into your PMU brush set and break down how to use each brush intentionally for mapping, strokes, and shading.