
Files App Setup for PMU Practice

The Files App is the main location where all of your downloaded digital tools are stored.
Anytime you download something such as:
Procreate files
brush sets
ebooks
templates
images
they will appear inside the Files App.
Lesson 1
In this lesson…
you’ll learn how to use the Files App on your iPad to locate, organize, and access your digital tools.
Understanding where your downloads live is the first step to confidently working with Procreate files, brush sets, templates and other digital resources for your beauty business.
Start Lesson 1 ↓
This is Video 1 of the Sacred Beauty Art 5-Part Setup Series, designed to help you build a strong digital workflow for practicing PMU with Procreate.
Step-by-Step Guide ↓
✦ Step 1 - Open the Files App
Find the Files App on your iPad.
The icon looks like a blue folder.
If you cannot find it:
Swipe down on your home screen
Type Files into the search bar
Tap the Files App when it appears
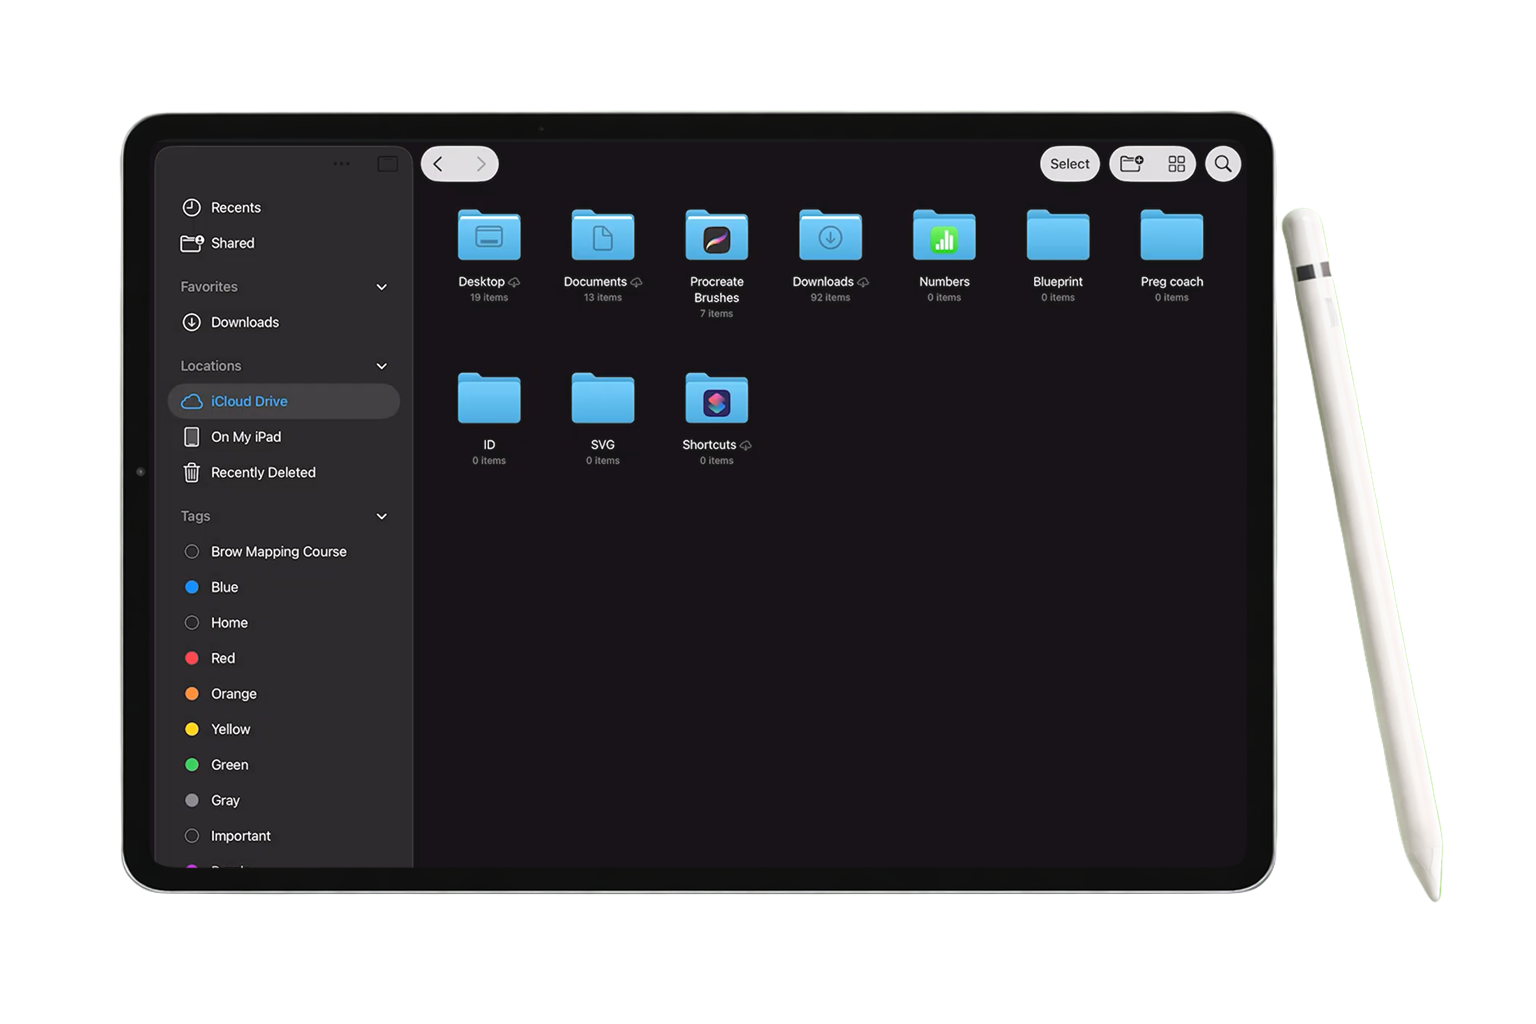
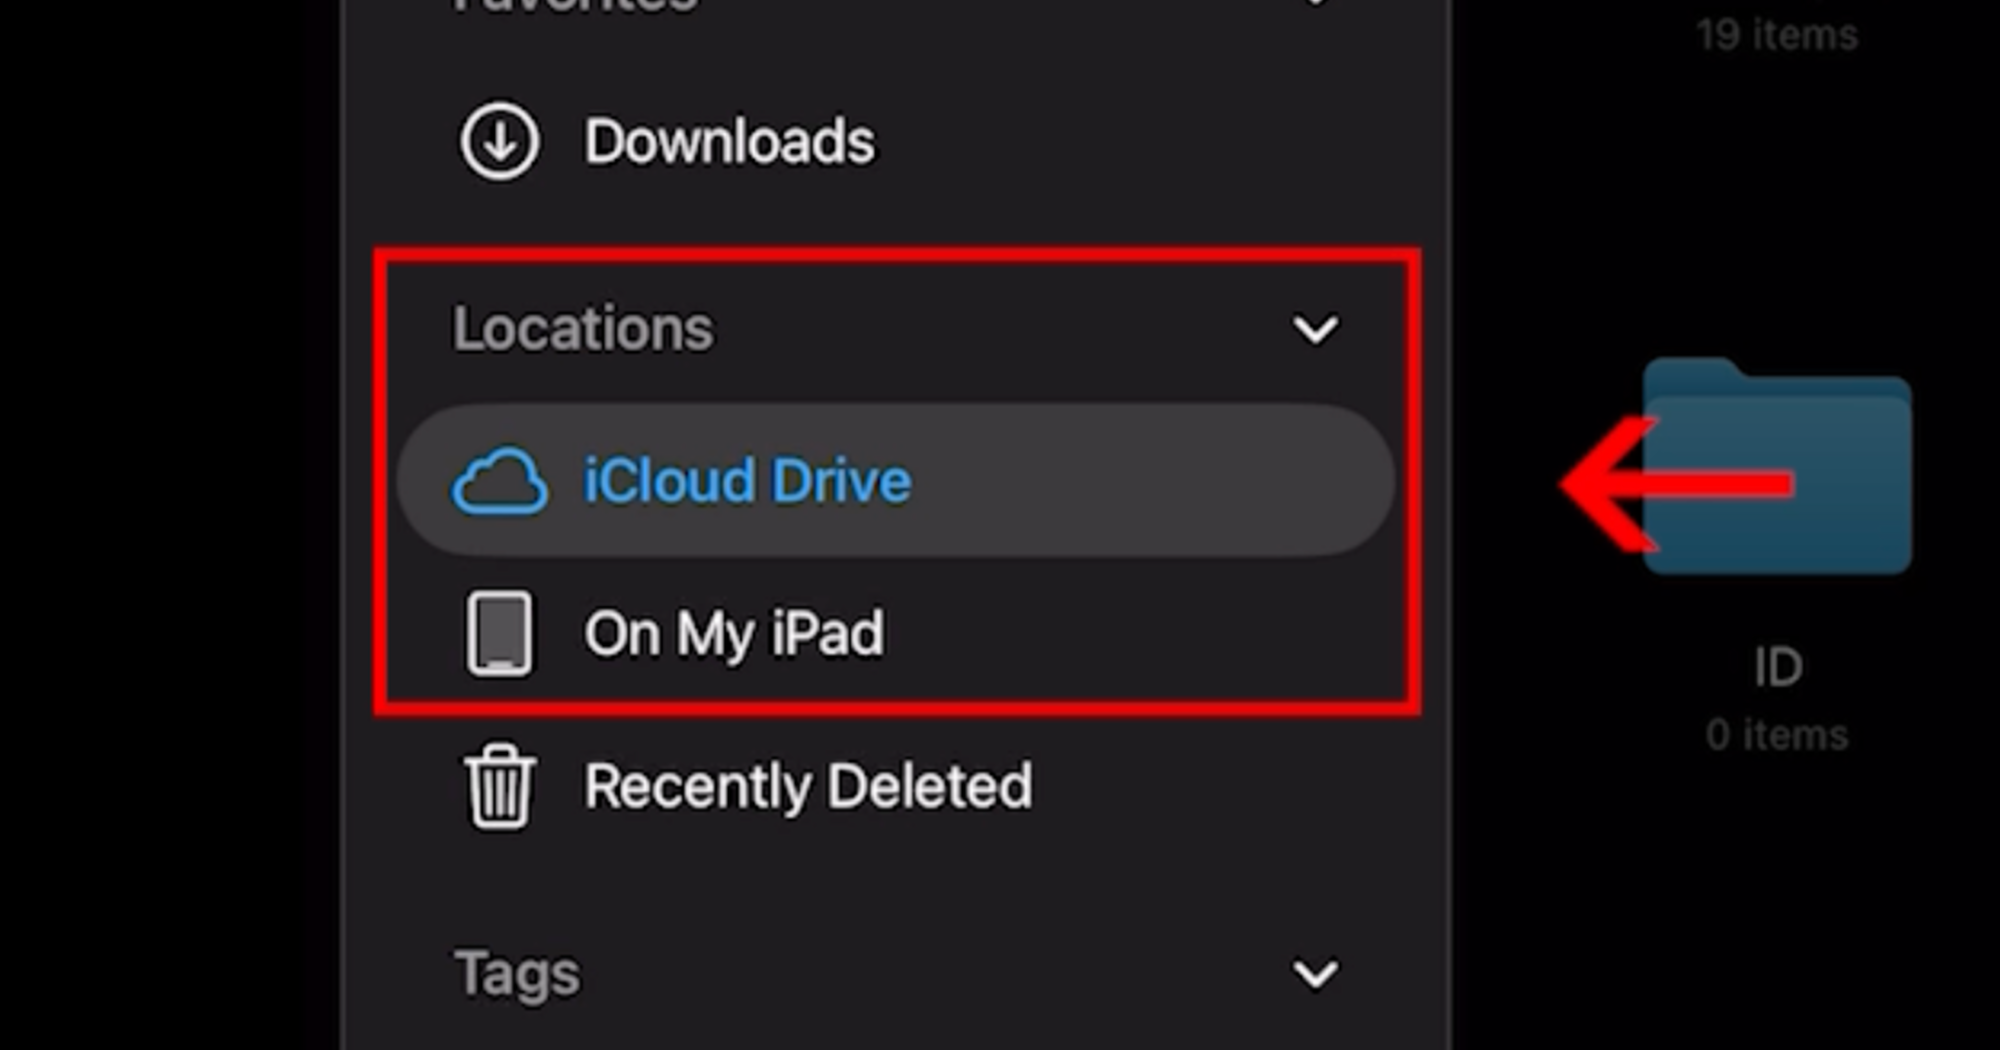
✦ Step 2 - Understand the Two Storage Locations
Inside the Files App you will see two main locations:
✔︎ On My iPad
Files saved here live directly on your device. They open quickly and do not require internet access.
✔︎ iCloud Drive
Files saved here are stored online through Apple’s iCloud system. This allows your files to sync across devices such as your iPad and computer.
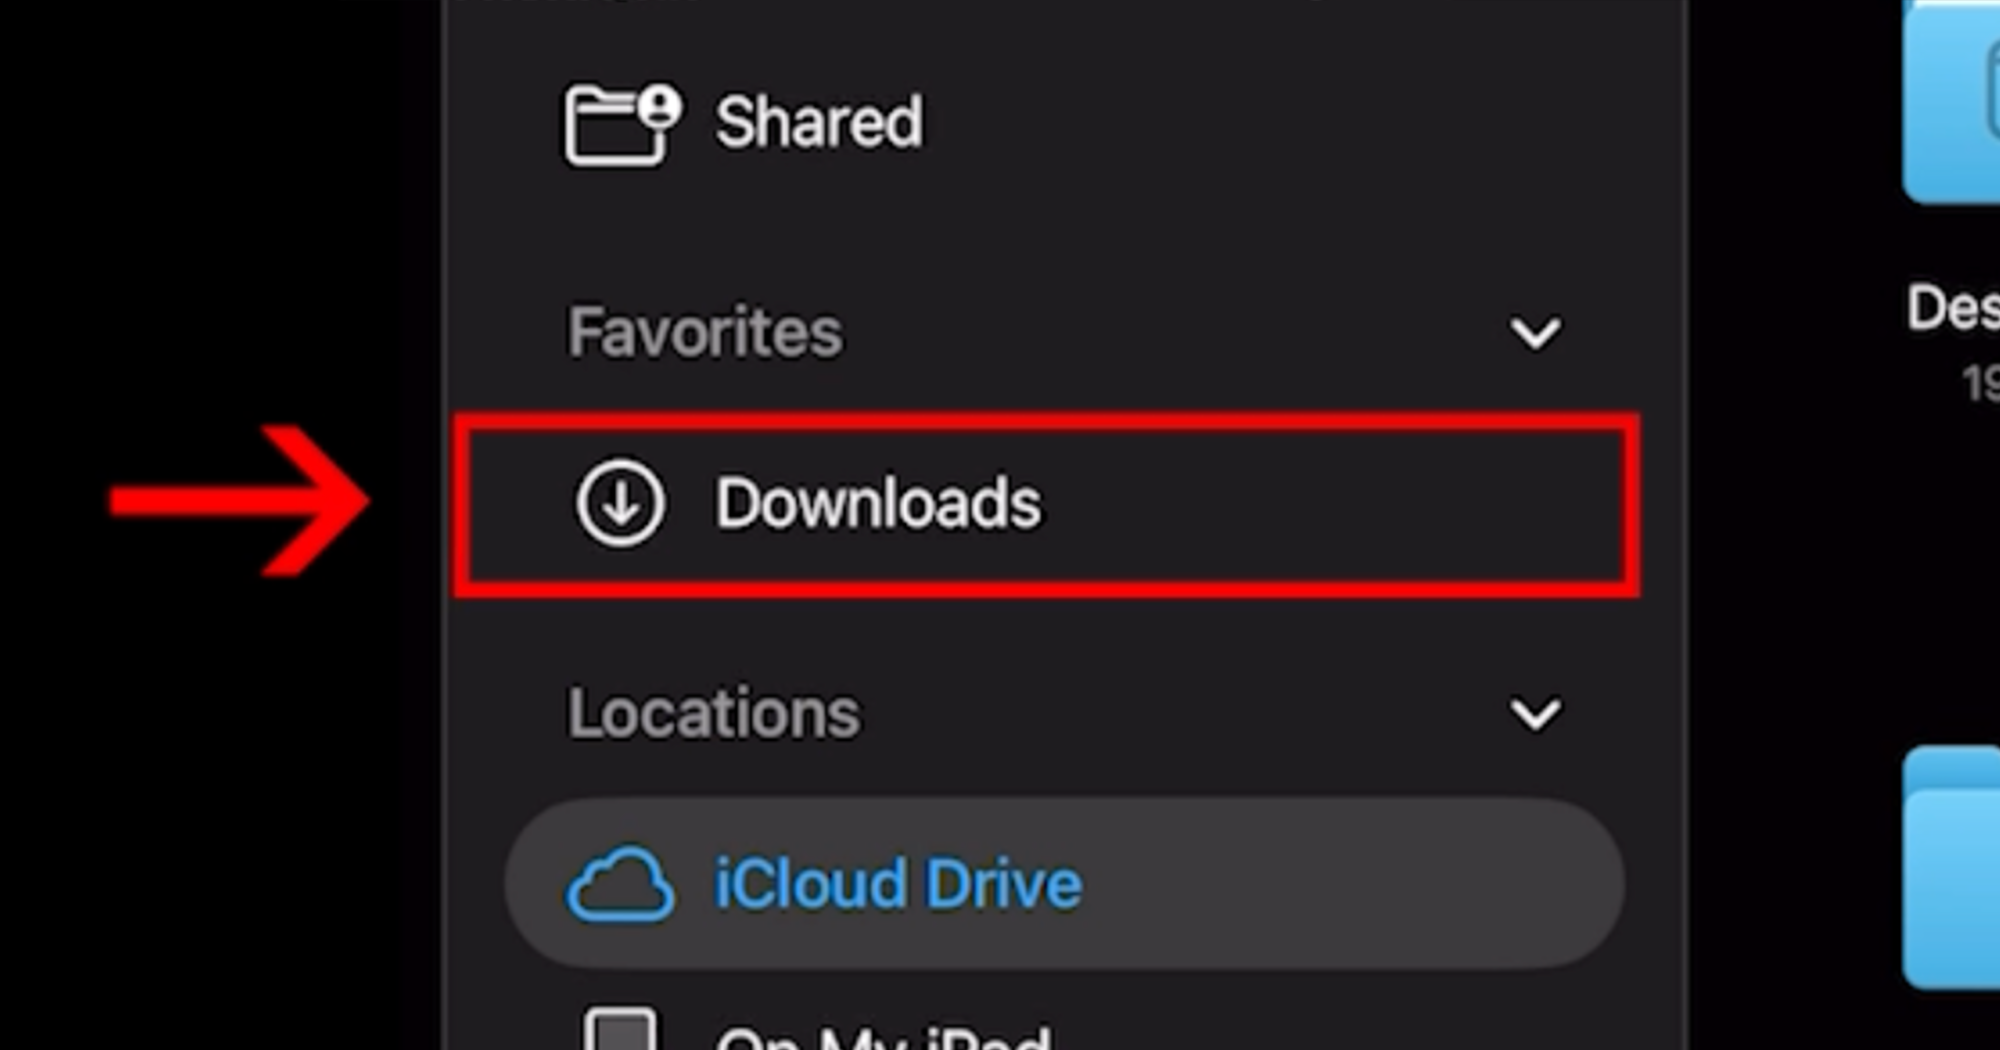
✦ Step 3 - Find Your Downloads
If you recently downloaded a file and cannot find it, open the Downloads folder.
This folder shows the newest files you’ve downloaded or opened.
Most files downloaded from places like:
Etsy
Google drive
Filemonk
Email
will appear here first.
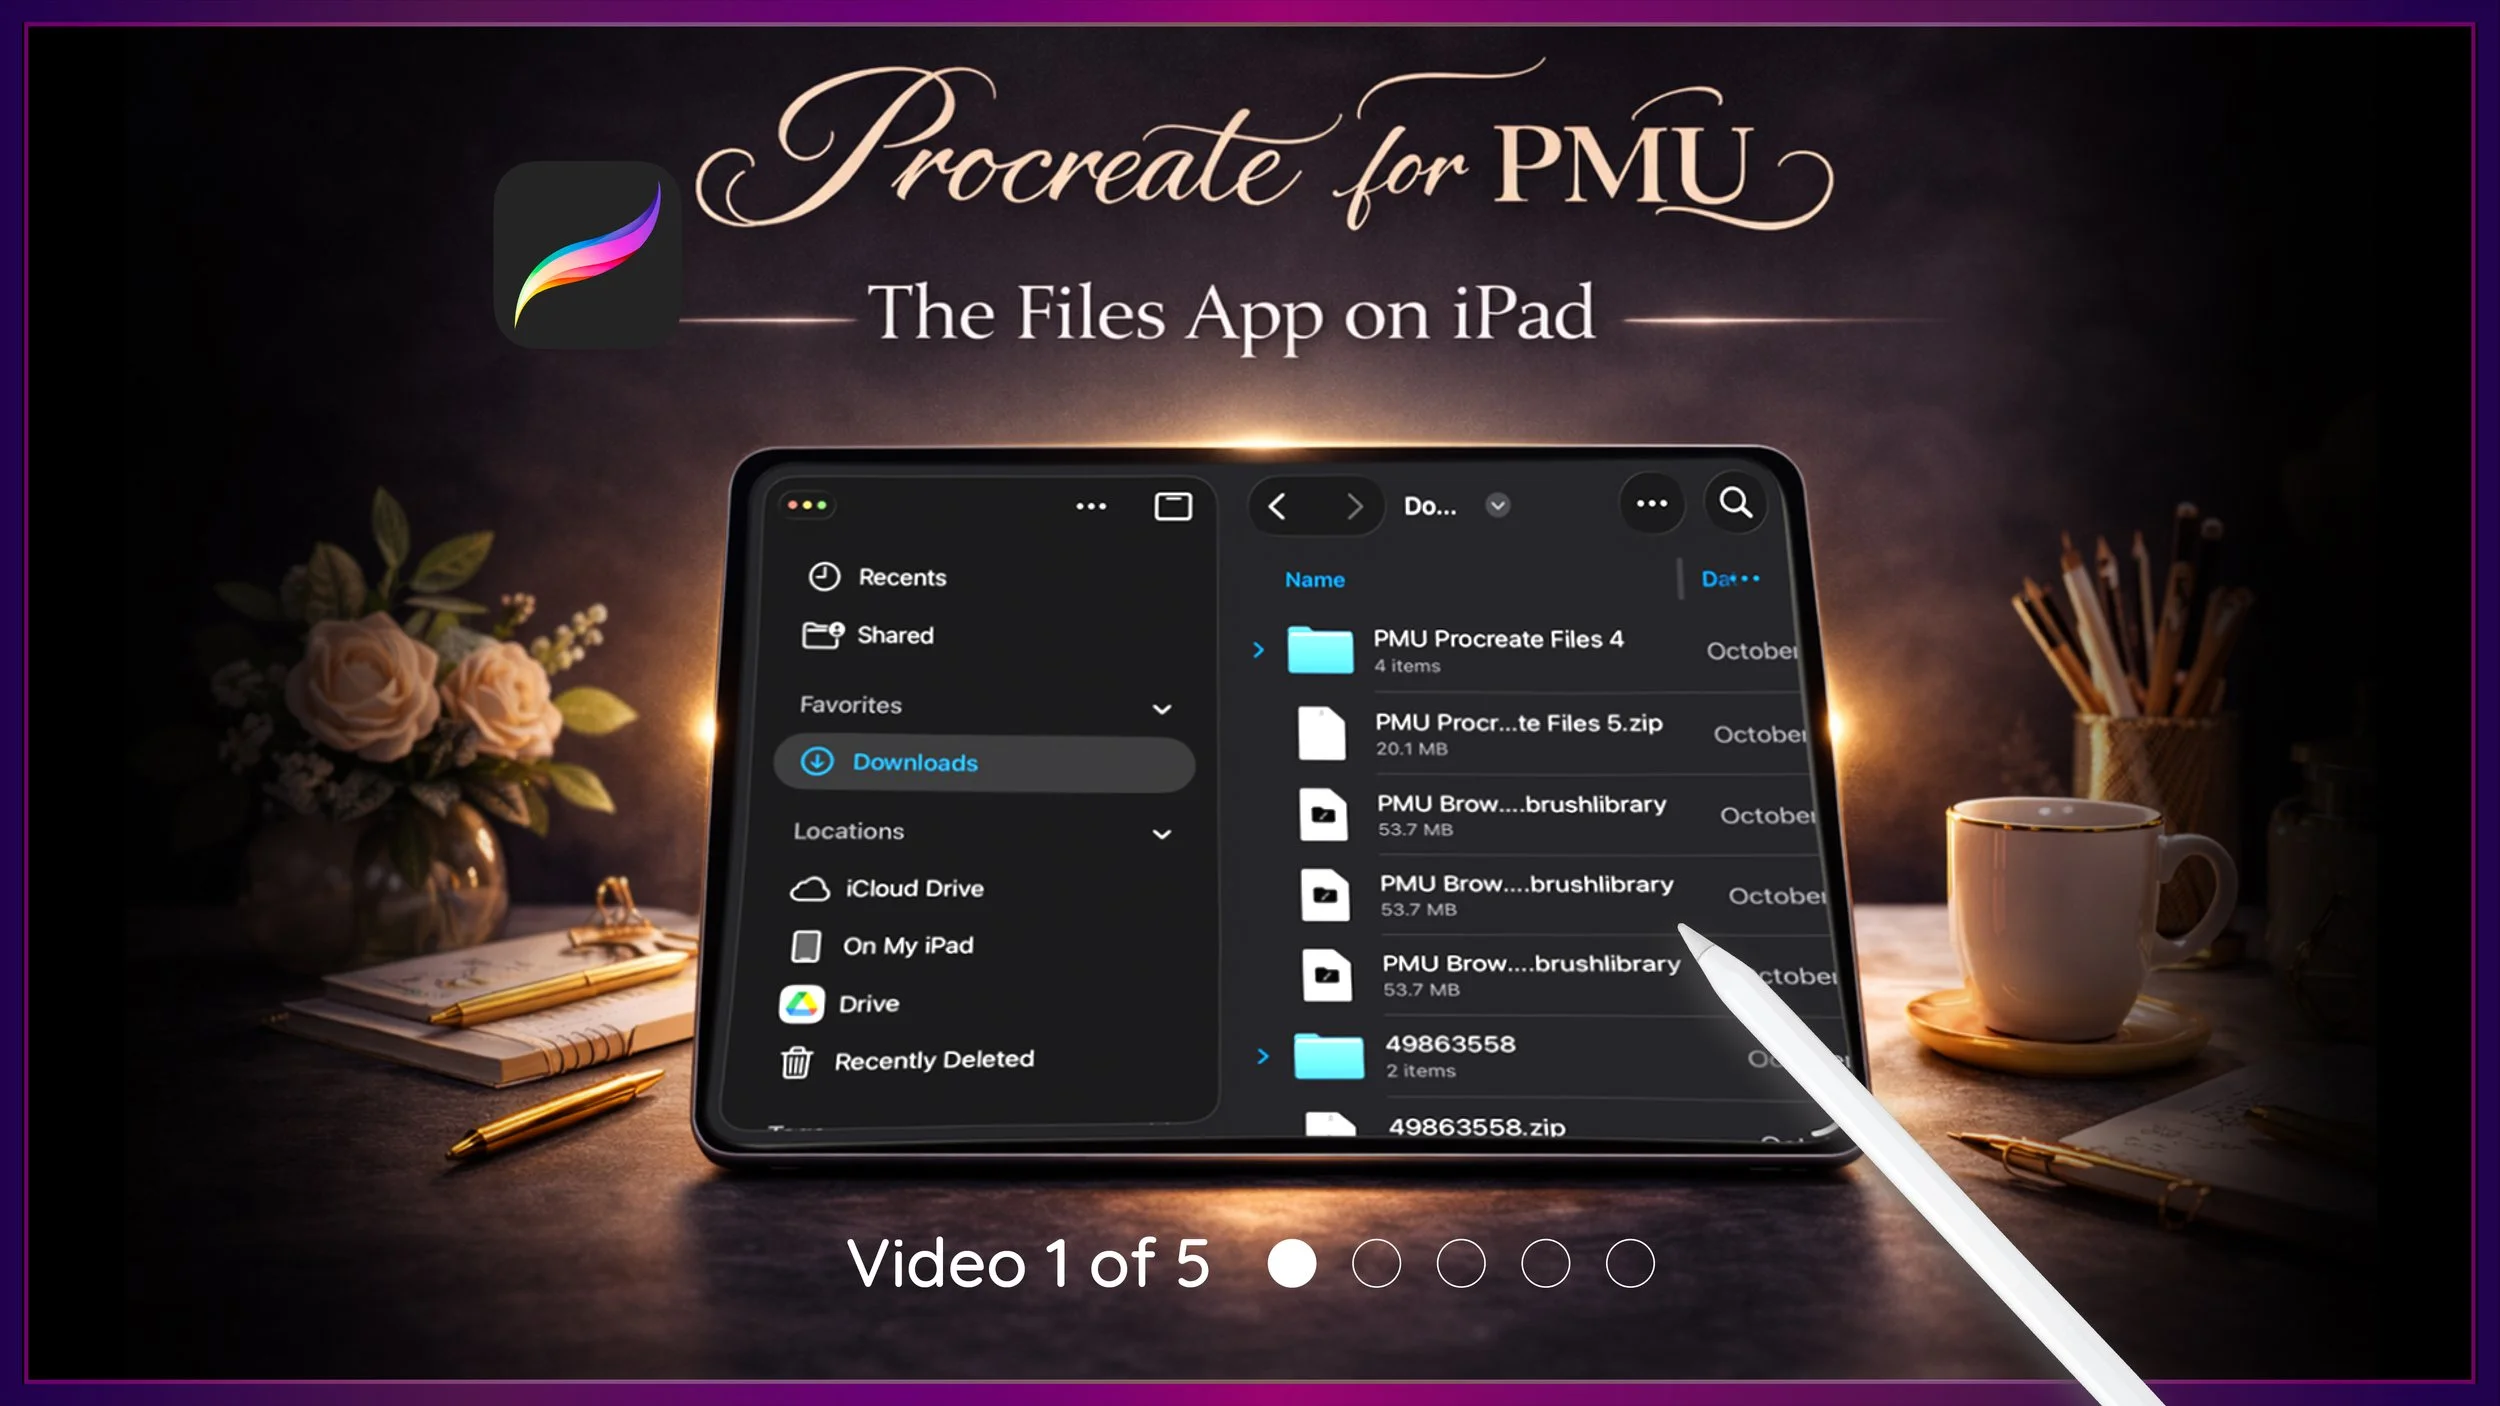
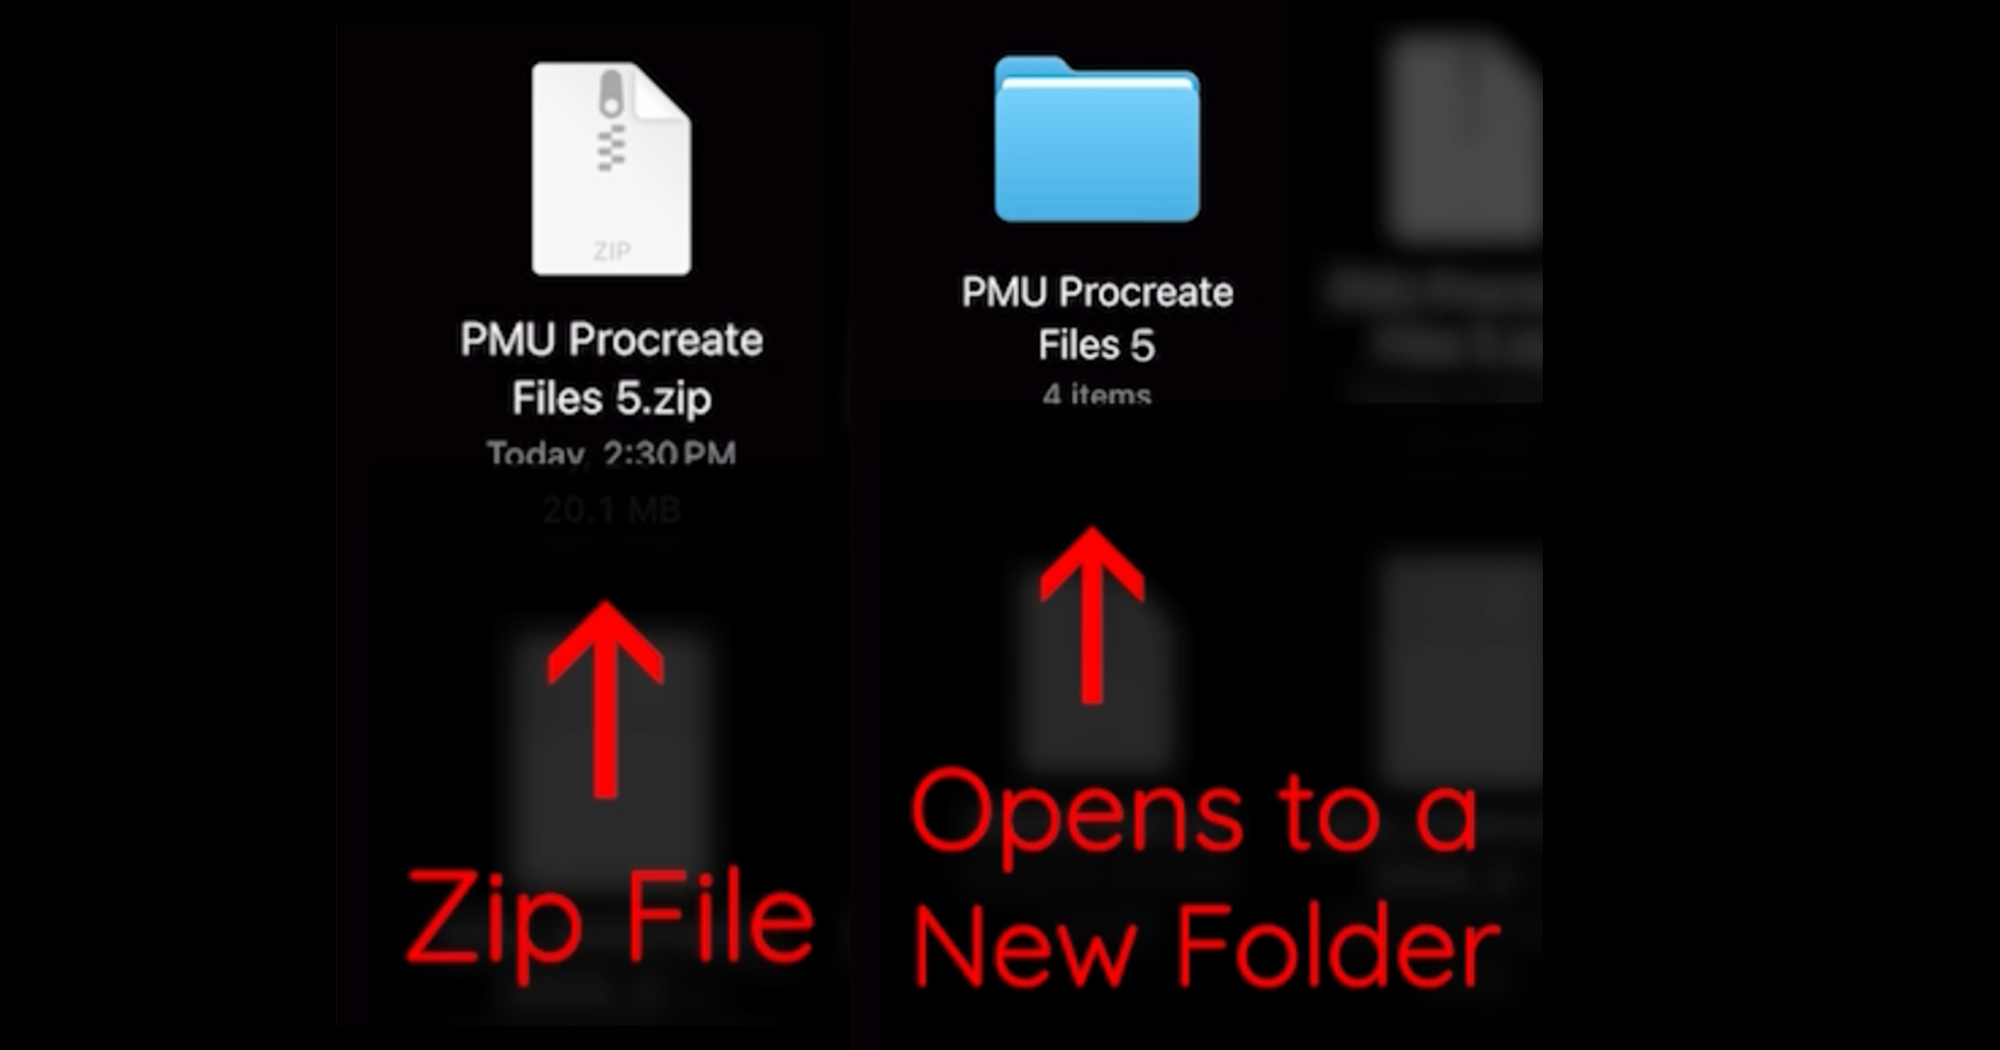
✦ Step 4 - Open ZIP Files
Sometimes downloads arrive as ZIP files.
When you tap a ZIP file, your iPad will automatically create a new folder containing the extracted files.
Inside that folder you will find the actual files you will use in Procreate.
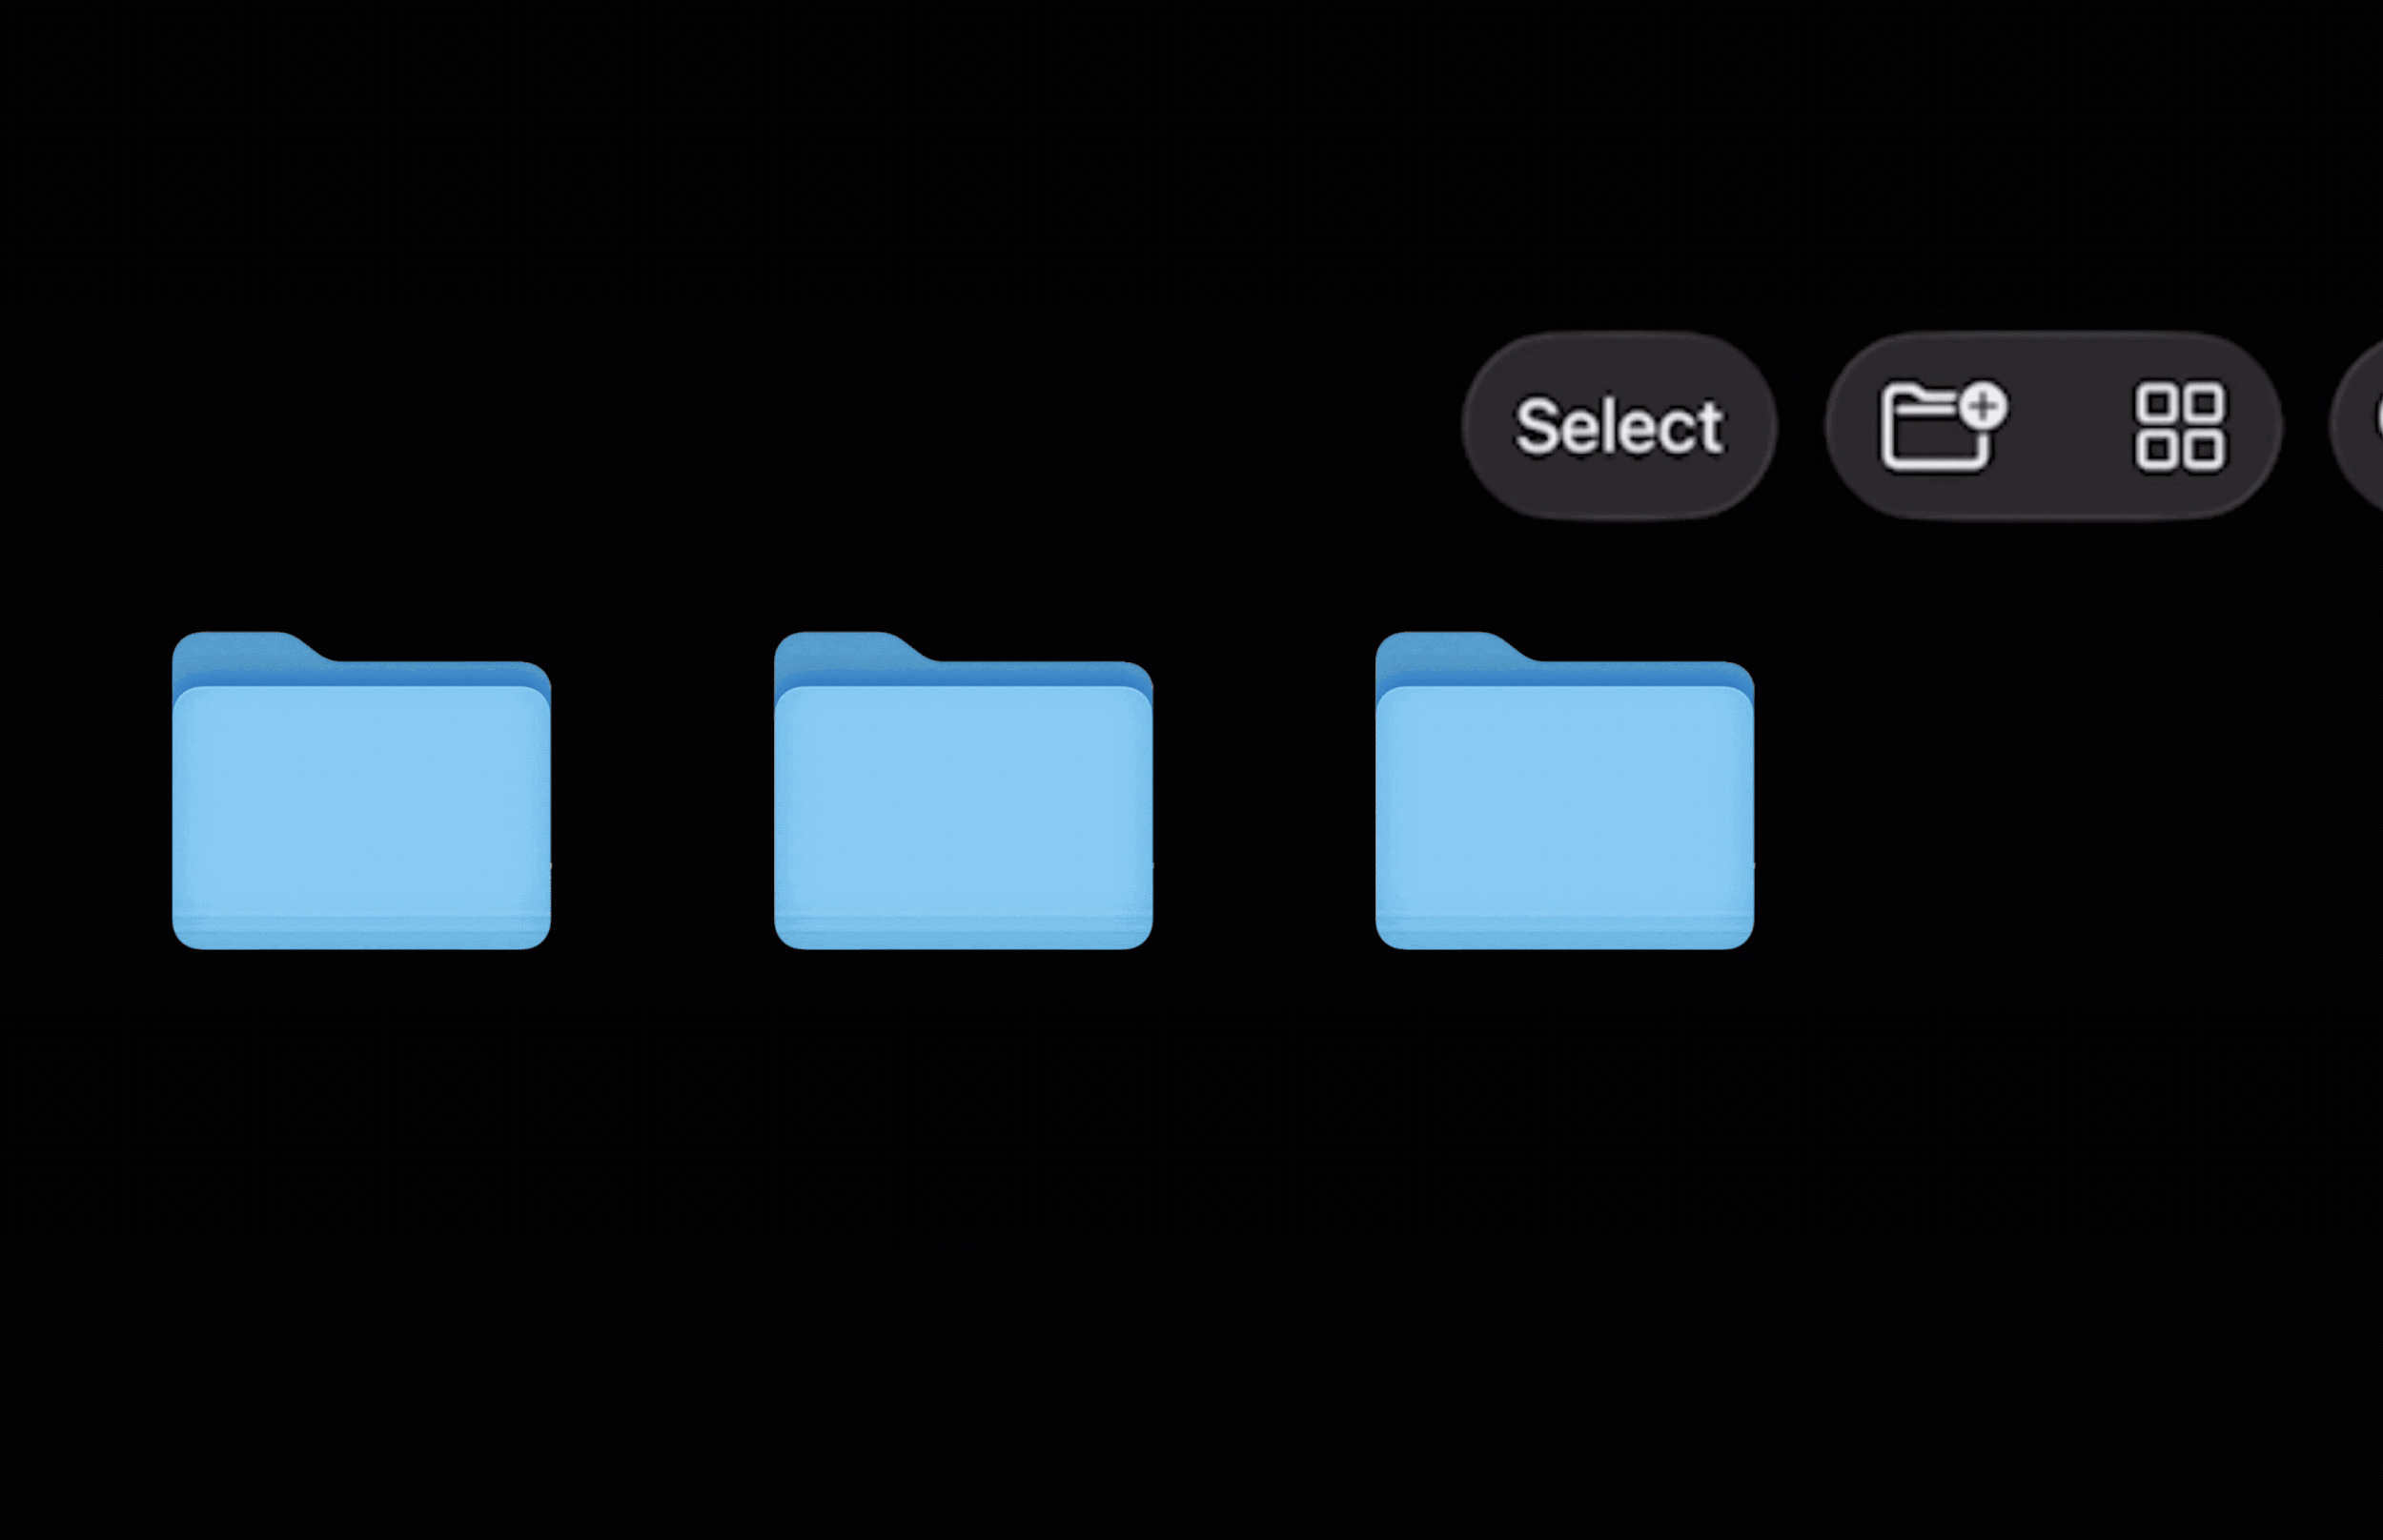
✦ Step 5 - Create an Organized Folder
Keeping your digital tools organized will make everything easier as you continue learning.
+ Create a new folder for your beauty business tools.
To do this:
Tap the folder icon in the top right
Name the folder
Example:
Beauty Business Tools
Inside this folder you can create additional folders such as:
Brush Sets
Ebooks
Client Forms
Practice Materials
✦ Step 6 - Move Files to iCloud (Optional)
If you’d like access to your files from your computer as well, you can move folders into iCloud Drive.
To do this:
Tap and hold the folder
Select Move
Choose iCloud Drive
Tap Copy
A syncing icon will appear while the file uploads. Once finished, your files will be accessible from other devices connected to your iCloud account.

Why File Organization Matters for PMU Artists
When working with digital practice tools, organization becomes extremely important.
Your brushsets, swatches, templates and model images will all be stored in the Files app before being imported into Procreate. If your files are scattered across different locations on your device, it can quickly become confusing to find the resources you need during practice.
Creating a dedicated folders for your PMU practice tools allows you to keep everything organized and accessible as you move through your digital training.
⚠︎ Storage Tip
If your iPad ever shows a message such as:
File unavailable
Not enough storage
Check your storage settings and go to:
Settings → iCloud → Manage Storage
Here you can see how much space is available and remove unused files if needed.
✨ Your Goal for This Lesson
Before moving on, take a moment to:
✔ Open the Files App
✔ Locate your Downloads folder
✔ Find the file you downloaded
Once you’re comfortable navigating the Files App, you’re ready for the next step.
Up Next…
In the next lesson we will open Procreate and learn how to set up your first canvas so everything is ready for digital PMU practice.